Ver esta página en español
This page will give you all the guidelines to make a piece for the Forest of hope
Read more about this
collective stitching project here
In 2021 we stitched more than 180 trees in total. In 2022 we are inviting you to help the forest grow even more, and also create flora, fauna and fungi, to complete the ecosystem.
Want to join in but don’t know what to stitch? We have some ideas for you here (coming soon).
What you chose to stitch and how is completely up to you, but we ask you to follow these guidelines carefully so that the great forest can easily come together with the button and button hole system.
You can chose to follow the step by step photo instructions or watch the videos (still in Spanish for the minute, we’re working on it).
Materials
Please use recycled materials, especially the fabrics in your project. We all have old clothes at home that need to be repurposed and kept out of landfill. If you run out of thread that’s trickier to get repurposed, but please please, only used recycled fabrics and buttons! Please do not buy fabric because that would undermine the meaning of this collective installation for nature and the common good. You can read more about the environmental and social implications of the textile industry here and here or you could get a pdf of Loved Clothes Last by FashionRevolution here (for whatever you can pay).
Step 1 – choosing your background fabric

Look for some LIGHT coloured old fabrics: sheets, shirts, curtains, skirts, whatever you have!
Some old and well loved fabrics are fragile. We don’t want them to break, so if this is the case, double the fabric up (or more, as necessary).
Step 2 – cutting your fabric
For a TREE, cut your fabric to measure 34cm wide and 64cm long.
For an animal, bird, insect, reptile or mushroom, measure 34cm x 34cm.
Take nice pictures of your process so that you have a «before» shot.

You will design a tree to fit within 30 x 60cm, or for an animal, bird, insect, reptile or mushroom within 30 x 30cm (the cutting instructions allow for 2cm on all sides for hemming).
The tree shape should be twice the length of the non-tree species.
Step 3 – strengthening the background fabric
Strengthen the fabric at top and bottom (at least a 10cm strip). This is to make sure that there are no rips during windy outdoor installations. (We’ve had no incidents to date!)
Stitch all four hems. (Some stitchers prefer to finish these at the end of the embroidery, it’s really up to you.)
Step 4 – create your tree
Create your tree (or animal/bird/insect/flower/mushroom) as you wish. We recommend that you chose a wild species you can relate to. For example a specific species that is local to where you live (this is a way of representing your locality in the bigger forest metaphor) or a specific individual that has special meaning for you. Whatever you chose is fine and we love to hear the stories behind the choices.

You can use any textile techniques you chose to represent your tree: embroidery, apliqué, textile paint… The following are some points to keep in mind:
- if you use paint or dyed fabrics: make sure it’s permanent. However fast we take down the installation in a sudden rainstorm, the pieces do run the risk of getting wet at some point! (This goes for dyes used on threads too!)
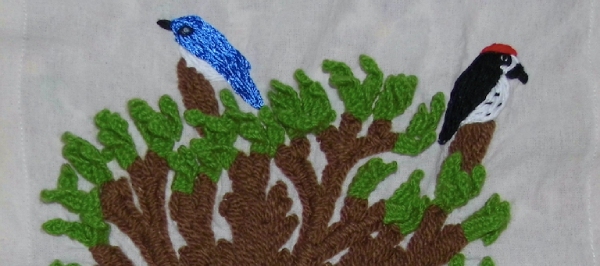
- the installation is designed to be viewed both from a far and close to. Try to make sure your design uses high contrast colours so that it reads as a tree from afar but you can also add smaller details which people love to discover when they get closer. Adding small fauna, flora and fungi around your tree shape is great fun.
Remember to take lots of pictures of your piece while you make it. It’s beautiful to track its progress and we can use your pictures to keep the project visible on social media.
Step 5 – buttons (bottom) and button holes (top)
Following the sizing guide, create two button holes on the top of your tree and add two buttons on the bottom.

The location of buttons and button holes has to be measured as accurately as possible so that the embroideries can hang flat and the craftmanship displayed at its best when the installation comes together.
Generally speaking we advise creating button holes and adding buttons after you have finished your piece and hemmed it. That way you can measure exactly where your centre line is (dotted red line on the diagram). From this centre line, measure 11cm in each direction. Don’t measure in from the side, because if your fabric is slightly off the 30cm (everyone’s are!) then your buttons won’t be 22 cm apart. Always measure 11cm from the centre line!
The button holes go at the top, should be 11cm either side of the centre line. They will measure 2cm and start 2cm from the top edge.

The buttons (2cm diameter or less) go at the bottom should be attached 11cm from the centre line and 3cm from the bottom edge of your piece.
If you can’t find 2cm buttons please err on the smaller size, otherwise the buttons on your artwork will be too large to attach another artwork to it.
Once you’ve finished…
Sign your artwork (embroidered on the front or in permanent marker on the back so we know whose it is) and send us your beautiful art work so we can install it with the rest of the forest!
There are now several groups stitching in different countries. Argentina, Chile, Mexico, France, UK, Sweden. If you would like to join in, please let us know so we can put you in touch with the nearest person to you who could receive your embroidery.
You can contact us on:
email: zurciendoelplaneta@gmail.com
DM on instagram: @zurciendoelplaneta
2 respuestas a «Embroidery guide»
Congratulations for this wonderful initiative! We are excited to participate. Let´s stitch trees all over the planet!
Welcome Maria!!! How are you and where are you? Perhaps we can hook you up with some local stitchers…